In this tutorial you will create a working HTML5 physics simulation with interactivity and animated graphics.
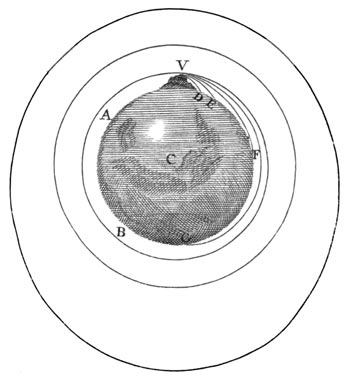
The example I’ve chosen is to animate Newton’s Cannon, a famous thought experiment and illustration by Isaac Newton, in which he asks his reader to imagine the motions of projectiles launched horizontally from a high mountaintop at various speeds.
You can find many animated versions of Newton’s Cannon on the web, but most of them are done in Flash or Java, both of which require plug-ins and don’t work on mobile devices. My own inspiration comes from a version by Michael Fowler and Drew Dolgert.
I’ve broken the creation of this simulation into steps, described in detail below. The initial steps are the same as for creating any web page; the animation and interactivity will come later.
The first thing you need is a folder on your hard drive in which you will work. Go ahead and create one now, and call it “html5” or whatever else you like.
Next you need a text-editing application where you can type. If you already have a favorite programmer’s text editor, just use that. Otherwise, I recommend Notepad++ for Windows or TextWrangler for MacOS. Both are free and easy to use, so don’t hesitate to download and install one of them right now. You can get away with using Notepad on Windows or TextEdit on MacOS (both of which come pre-installed), but these editors lack some of the features that are most convenient for editing code. (If you use TextEdit, be sure to choose Make Plain Text from the Format menu before you begin typing.)
Once your text editor is ready, launch it and open a new blank document. Save it in the folder you just created, with the name “NewtonsCannon.html”. Then type the following text into your document:
Newton's Cannon

This simulation is based on Isaac Newton's famous thought
experiment and illustration of firing a projectile from a high
mountaintop at various speeds, as he described in A Treatise
of the System of the World.
After saving this text, launch your favorite web browser and use it to open the document you just created. You can probably do this by simply double-clicking on the document’s icon in a Windows Explorer or Finder window. Alternatively, look for an “Open File” command in your browser’s menus. Either way, the document should open in a browser window and you should see the text above (though the formatting will be different).
Your browser probably just displayed what you typed as one big “paragraph”,
with no indication that the first two words are actually a title or heading. To remedy this,
you need to add markup tags to label the logical parts of the document. In HTML,
markup tags are enclosed in angle brackets. To mark a major heading on a page you enclose
it in h1 tags:
<h1>Newton's Cannon</h1>Note the
/ character, which distinguishes the closing tag from the opening
tag. (The numeral 1 denotes a first-level heading; you can use h2 through
h6 for lower-level headings.)
To mark a paragraph, you enclose it in p tags:
<p>This simulation is based on Isaac Newton's... </p>
After you’ve added the h1 and p tags, save your
document and reload it in your web browser. The heading should now appear on a line by
itself, in a much larger font.
Although your minimal markup works just fine, it’s technically in violation of the rules of HTML because you’ve omitted a bunch of boilerplate markup that sets out the basic context. Here’s what it should look like with the boilerplate:
<!DOCTYPE html>
<html>
    <head>
        <meta charset="utf-8">
        <title>Newton's Cannon</title>
    </head>
    <body>
        <h1>Newton's Cannon</h1>
        <p>This simulation is based on Isaac Newton's...  </p>
    </body>
</html>
I’ve used indentation to make the logical structure more clear to the eye. (This
isn’t required, but you should use some combination of indentation
and blank lines to make your HTML code more readable.) Each pair of opening and closing HTML
tags defines what we call an element, such as the heading and paragraph elements that
you defined previously. But all of the content of your page should be enclosed inside a
body element, which in turn is nested inside the all-encompassing html
element. Inside html but before body comes the head
element, which sets out some preliminary information about the character encoding of your
HTML file and the title of your web page (which your browser will ordinarily display at the
top of the window). Before everything comes the DOCTYPE declaration, which
technically isn’t an HTML element at all even though it looks like one.
Whether all these codes make sense to you or not, please type them verbatim into your document, save the changes, refresh your browser window, and check that the page content appears the same as before.
This is one example of how web browsers tend to be extremely forgiving of coding errors and omissions, as long as their algorithms can still come up with some way to display your content. The lack of enforcement of rules makes your job as a programmer more difficult, because coding errors can lead to unexpected behavior whose cause is difficult to trace. So you need to develop good habits and pay attention to details, even when you think they don’t matter.
So far, your browser is displaying everything on your page using its default styles: probably a serif font of a certain size, in black on a white background, left-justified with lines that grow or shrink as you change the size of the window, with a much larger font for the heading and a certain amount of space between it and the paragraph. All of these defaults are easy to change.
The easiest way to change styling is by inserting a style attribute into an opening
HTML tag. For example, you can change the font throughout the page by modifying the <body>
tag as follows:
<body style="font-family:sans-serif;">
Be careful of the syntax here, paying attention to all the punctuation symbols. After you save this change and reload the page, you’ll see that the font has changed.
In this example, font-family is just one of many CSS properties that you
can specify. Here are some other property settings to try in the body element:
font-size:15px;
width:600px;
margin-left:auto;
margin-right:auto;
background-color:#c0c0c0;
Put these all, one after another (in any order), inside the quotes along with the
font-family setting, and check the results. The margin settings cause your
content to be centered in the browser window. The background color (light gray in this case)
is specified as three two-digit hexadecimal (0 through f) numbers, for the brightnesses of the red,
green, and blue components: #rrggbb. By all means, try some other colors!
Besides changing the style of the whole page through the body element, you
can also change the styles of smaller pieces. Here are some styles to try in the
<h1> tag:
font-size:24px;
text-align:center;
color:#800000;
You may have noticed that setting font-size to 15px (15 pixels) in
the body affected the nested p (paragraph) element, but not the nested
h1 element; we say that the paragraph inherited this property from its
parent element (body), but h1 didn’t. It isn’t always
easy to guess when properties will be inherited and when they won’t, but the phenomenon
is something to be aware of.
I should probably warn you that most web developers frown upon this low-level method of specifying
styling. The alternatives are either (1) to put styling specifications at the top of the document
inside the special <style> element (which goes inside the <head>
element), or (2) to put styling specifications in a separate document called a style sheet,
which gets a .css extension.
In these ways you can apply common styling to all elements of a certain type (e.g.,
all paragraphs or all headings), and, in the second case, to multiple web pages (by linking from
all of them to the same style sheet). (The acronym CSS stands for Cascading Style Sheets,
where “cascading”
refers to the way that specific style rules can override more general ones.)
But for a small one-of-a-kind web page, the “in-line”
styling method described here is easiest.
Perhaps the most useful HTML element is a link to
another web page. To create one you use the <a> tag,
like this:
<a href="http://physics.weber.edu/">Click here!</a>
The letter a stands for anchor, for reasons that were more relevant
in earlier versions of HTML; the linked URL is specified in the href attribute,
where href stands for hypertext reference.
In your web page, a good place to add a link is on the title of Newton’s work, A Treatise of the System of the World. Here’s the URL for a Google Books scan of the Treatise:
http://books.google.com/books?id=DXE9AAAAcAAJ
After inserting the a tags around the title, with this URL for the href
attribute, save your page and test the link in your web browser.
The last “static” element that you need for your page is an image to serve as a background for the graphical output. I’ve placed a modified version of the original drawing from Newton’s Treatise at the following URL:
http://physics.weber.edu/schroeder/html5/NewtonDrawing.jpg
You could just link your page directly to my copy of the image, but it’s safer to keep your own copy, so please use your browser to download the image now and save it in your working folder.
To insert the image in your web page, use the img tag:
<img src="NewtonDrawing.jpg" width="500" height="500">
The attribute name src is an abbreviation for source, while the
width and height attributes specify the size of the image as
it should be displayed on the page, in units of nominal screen pixels (which should usually be the
same as the intrinsic resolution of the image). Place this
tag in your html file after the h1 element and before the p element.
The img tag is self-contained, with no text content, so it has no corresponding
closing tag (no </img>).
When you test this new code in your browser, the image should appear. But the image is
left-justified, not centered, which looks odd because it’s only 500 pixels wide while
the width of the page body is 600 pixels. You could, of course, change the latter to 500 pixels
and then everything would look fine. A more general solution is to separately center
the image by giving it some styling. A still more powerful approach (whose advantage you’ll see
when you add animated graphics in front of the image) is to enclose the image in an invisible
container or block, called a div (for division), and apply the styling to the
div:
<div style="width:500px; margin-left:auto; margin-right:auto;">
    <img src="NewtonDrawing.jpg" width="500" height="500">
</div>
Go ahead and make this change, and check that the image is now centered. (Be sure to note the
difference in syntax between the CSS width property in the first line
and the HTML width attribute in the second line.)
Before going on to add animation and interactivity to your web page, let’s pause to assess where we stand.
You’ve created a simple web page with a heading, a paragraph, a link, and an image, and you’ve applied some styling to these elements to change the default fonts, colors, and layout. To do these things, you’ve learned the basics of HTML to specify the logical structure of the page elements, and you’ve learned a bit of CSS to specify the styling.
To review the fundamental vocabulary and syntax of HTML and CSS, you may want to look at this summary page. I’ve also prepared this HTML and CSS reference sheet, which covers all of the elements and styles you’ve used so far, plus a few more that you may wish to learn in the near future.
Perhaps the best way to learn web development is to study examples. Unfortunately, most of the web pages you see these days are at least partially generated by machines, with no attempt to make the source code readable by humans. However, all of the pages associated with this tutorial were typed by hand and should be relatively easy to figure out (even if some of them use features that aren’t fully explained). Learn how to use your browser’s View Source command, and use it frequently.
If you would like a more comprehensive introduction to HTML and CSS, then I recommend the W3Schools site, which has a brief explanation of just about every HTML tag and attribute, and just about every CSS property, with simple examples that you can easily study and modify. To get answers to specific questions, I recommend simply googling them; more often than not, the search results will take you to Stack Overflow, an enormous question-and-answer site for programmers. Finally, sometimes what you want is a traditional textbook, organized by a real teacher and perhaps even printed on paper; the best one I’ve found on HTML and CSS is Learning Web Design, by Jennifer Niederst Robbins.
Next: Drawing and Animation